Showing posts with label 1970. Show all posts

Sunday, July 3, 2022

Midway S.A.M.I. Arcade intermittent problem repair

I've owned this 1970 Midway S.A.M.I. arcade game for about a year now.


When I first got it I went over the whole game. Cleaned the discs and wipers. Took apart the control unit. Burnished the connectors and perfectly aligned the film with the plane position disc.

Still it had an intermittent problem that would cause the hit relay not to energize.

I would fiddle with the connectors and jiggle the wires, check the continuity between the control unit disc and the plane position disc and the issue would solve itself for a couple months.

I can't say I play this game a lot. It's not a good game to have in a home environment. The plane pattern is too easy to memorize and then there's no challenge to the game. But I like to play it occasionally. Or like when I have some people over.  So when I turn on the game, it's always a gamble whether the game behaves or not.

So when I turned the game ON earlier this week... no dice. Again the multimeter and connector jiggle routine. But this time I finally stumbled upon the problem.

Can you see the problem in the picture below? BTW I slightly enhanced the problem to make it easier to find.


Maybe in this picture?


Turns out the problem the whole time was a broken bare wire jumper for the grey wire between solder lugs on the Hit Relay unit.

The intermittent nature of the problem came from the broken jumper just touching the gob of solder on the lug for the hit relay coil hence why jiggling the wire would "fix it" for awhile.

On the schematic, the problem would be in the red box to put it into perspective.


I completely replaced the bare wire jumper and now it's all good.

This is the kind of stuff you have to look for when working on old arcade games.


Tuesday, December 15, 2020

Allied Leisure Wild Cycle New In Box Inside photos part III

Allied Leisure Wild Cycle NIB

Here I conclude documenting the insides of Allied Leisure Wild cycle arcade game as it came out of the box. Time for the relay panel.

Right in the middle of the panel at the top. It looks like there's a unit missing. It's the Crash unit. When I opened the back door for the first time, the Crash unit was just flopping around loose. Fortunately the unit was undamaged and I installed it back in its place. The words quality control come to mind.


Crash unit on the loose.


Sound effect board


Plays per coin adjustment


Relay pin legend. All the relays are 120V


Sound effect board


Crash switch assembly front


Crash switch assembly back. Painted cams


Fuses


Game timer with adjustment potentiometer and resistor. That silly resistor just poking down.


Nest post: Repairs!

Looking good.


I recycled one of the box sides as a wall hanger in the basement.

Sunday, December 13, 2020

Allied Leisure Wild Cycle New In Box Inside photos part II

Allied Leisure Wild Cycle NIB

Here I continue documenting the insides of Allied Leisure Wild cycle arcade game as it came out of the box. Here I do the back of the game. Notably the 8-Track player, score unit, motorcycle unit and projector.

At the very top of the cabinet is the 8-Track player. Notice the door flap looks crooked. That's because one of the hinges for the flap was broken. Right out of the box!


The 8-Track has its own power sub assembly board.


Score unit is of a projector type that looks alot like score units found in pingames from the mid 30's to early 40's.


Score unit projects onto a mate window on the "Backglass"


Motorcycle manakin is at the back of the cabinet. The motorcycle is moved left to right by a servo-motor with a pulley fitted with a O-ring on a aluminum channel. There's a small solenoid that tilts the motorcycle onto its side when there's a crash.


Aluminum channel for motorcycle travel


Photoresistors that detect if the motorcycle is on the track. The motorcycle is above a mate projector screen. The photoresistors run parallel to the motorcycle under the screen and point onto a mirror that directs the projected track onto the screen.


The projector unit at the bottom of the cabinet. It projects onto a series of mirrors (not shown) and ultimately onto a projector screen.


There's 3 tracks printed onto the discs. The track select unit slides the disc left to right to align one of the tracks with the projector bulb and lens.


Disc with the tracks printed on. To the left there's a series of cam switches that warn the player of upcoming road hazards. Notice the dust on the disc. Even it the machine was closed up and inside a box, dust still managed to get inside after 50 years.


A servo-motor spins the disk at a speed proportional to the handlebar throttle.


Next post I will document the relay panel

Saturday, December 12, 2020

Allied Leisure Wild Cycle New In Box Inside photos part I

Allied Leisure Wild Cycle NIB

Previous post was all about unboxing Wild Cycle.

Now it's time to document the machine's insides.

I guess this is more of a photo archive than a "blog post" for Wild Cycle since there isn't that many detailed pictures online.

Publishing in one shot all the pictures I have of the insides of Wild Cycle would have made for too big of a post so I will break it up into multiple posts and start with behind the coin door.

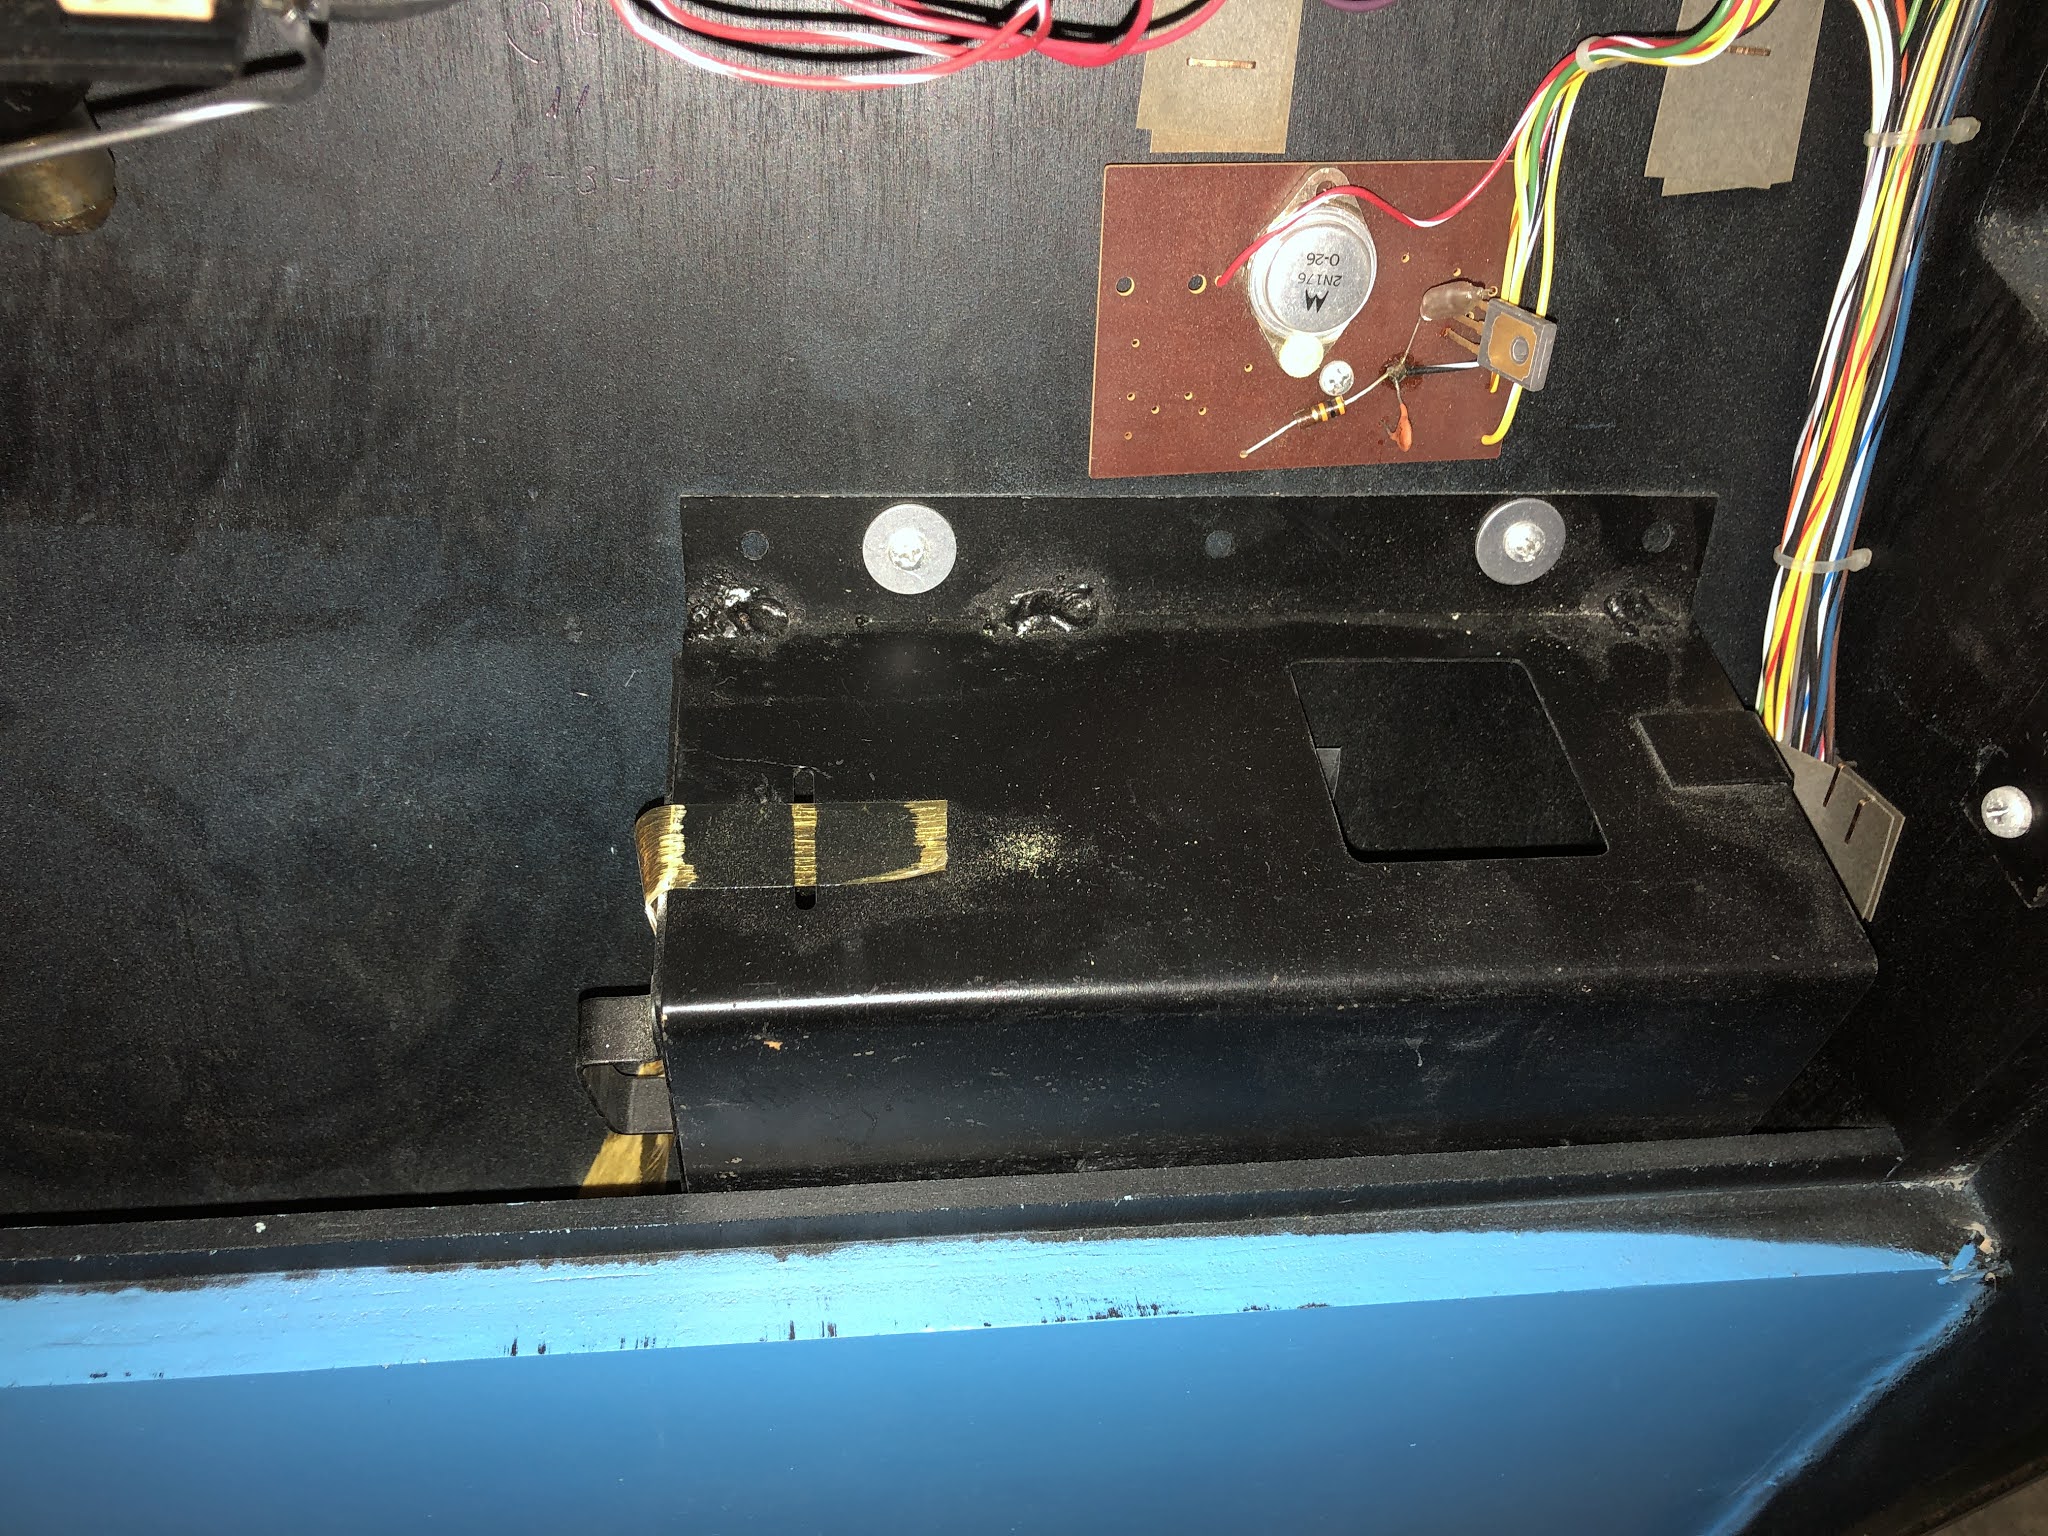
Here's a general view of behind the coin door. We can see the coinbox, music speakers, sound effect speaker, coin meter, handlebar shake solenoid, steering mechanism and a small sub board for crash detection.


Coinbox that contained alternate coin entry pricing window and casters at unboxing.

Above the coinbox is a small rough looking circuit board. The 2N 176 transistor is for the steering speed circuit. The neon lamp and Thyristor is part of the crash detection circuit. 


Closeup of the handlebar column that goes to the steering switches. Jones connectors to unplug sub assemblies. Adjustment potentiometer low speed road travel adjustment. 


Steering column, centering arm, left and right switches. The motorcycle is not mechanically steered by the handlebars. Turning the handlebars closes the left or right switches and these drive a servo-motor onto which the motorcycle is attached. The grease on the mechanism still feels fresh after 50 years!


Total coin meter at 99993 at unboxing. I guess this allows for some factory test playing.
Handlebar shake solenoid that makes a big knock felt through the handlebars when the motorcycle crashes. Speaker on the left is for a 8-Track tape player.


Sound effect speaker that makes Put-Put noises relative to the speed of the motorcycle in play. Volume adjustment wire wound resistor below. Notice the speaker is covered in a fuzzy layer of oxide that has since been wiped off with a rag.


Coin mech: US 25 cent mechanism delivered to Canada.


Coin mech and coin switch.

Monday, December 7, 2020

Unboxing a 1970 Allied Leisure Wild Cycle Motorcycle Arcade

 Unboxing a 1970 Allied Leisure Wild Cycle arcade machine.

I had the opportunity to purchase a New In Box (NIB) game, but not just any kind of NIB. My kind of NIB... from 1970!

This is something I've dreamt of doing ever since I started collecting coin operated machines: unboxing a vintage machine.

I had to drive a 1300 km round trip to pick it up but it was worth it. Just for the experience.

When you are buying a vintage NIB it's a bit like Schrödinger's arcade machine. You don't know what's inside the box. You gotta take the risk.

It's not because the machine hasn't been opened that the machine is perfect... Especially after 50 years!

It's a cardboard box. Not a time capsule. It all depends on the storage conditions.

Be aware that rubber parts dry up. Box or no box. There's always the risk of corrosion (switch points and metal parts) or nasty traces left by critters.

I was fairly confident the machine was clean judging by the state of the box but you're never 100% sure.

In the end you're paying a premium for the privilege of the experience of unboxing the game. Once the game is unboxed it's most likely worth only a fraction of the paid price. All in all, I'm satisfied with the machine's condition. Could've been worse.

Here is a photo journey of Wild Cycle's unboxing. Enjoy!


Next post: pictures of the inside