Showing posts with label arcade. Show all posts

Thursday, March 9, 2023

1969 Midway Sea Raider repair

Midway's 1969 Sea Raider arcade repairs

To write is to illuminate. The writer must gild the edges of the mundane with his words to evoke something within the reader. But to paraphrase a fellow pinball writer I greatly respect: There's only so much you can write about changing a pinball coil. What then? Coin operated amusement devices are a means to an end. In the collecting world, the means are often confused with the end. The machines themselves are MacGuffins, a device to advance the plot. So to loop back to the Sea Raider(s) what do you do when you have a totally boring road trip and boring repairs? You try to fluff it up somewhat.

I like arcade games of that era. They have a certain naive charm. Over the years I've accumulated a few. Space Gun, Road Runner, Wild Cycle, S.A.M.I. and now Sea Raider.

Yes, the game play is simplistic and repetitive but I just love the colors, the sounds, the black lights the cardboard scenery.

A miniature Potemkin village, an allegory of the world we live in. Cardboard facades, flashy lights and mirrors. All to entertain and liberate you from your coins.


On a personal level, Sea Raider holds a special space in my memory. It was the first arcade game I ever got working. I wouldn't say fixed, but it worked and played- ish. I was 18 and had little repair experience then. I eventually sold the game around 2007 or 2008. I've missed it ever since.


A bit of condensed semi reliable arcade history:

Post WW2 was a time of innovation in the United States. The coin-op industry was no different: Flippers, bowlers, increasingly complex one ball games followed by bingo machines, driving games, shuffle alleys, etc. But by the 1960's what was new and novel was now stale and formulaic. The industry needed something new.

On the other side of the world, by the 1960's, the post war recovery of Japan was creating huge innovation, same with the emergent Japanese coin-op industry. The US coin-op industry took notice of the Japanese innovation boom and copied the games for the western market.

I think Kasco's Indy 500 (1969) produced under license as Chicago Coin's Speedway is the best known of these games. SEGA's Periscope led to Midway's Sea Raider, the first of a new era of submarine games (Sea Devil, Submarine, Sea Wolf). Curiously, Sea Raider cabinet art bares a remarkable resemblance to Bally's 1946 Undersea Raider.


The Japanese influence reinvigorated the North American EM coin-operated industry. These new games had cool effects and electronic sounds. But it was to be short lived: By 1972, the first video games appeared on the market and the rapidly developing solid state and computer technology meant that the days of electro-mechanical technology were numbered.

For more in depth coin operated amusement history, I recommend this super long article about the US and Japanese coin operated industry. It's way more detailed and well worth the read.

Sea Raider repairs:

Sea Raiders is a super basic game to work on. I think it's a good game to work on as an introduction to electro-mechanical arcade repair.

The best games to find are warehouse finds. From experience, the more previous owners between you and the last Coin Operator that put the game into storage, the more questionable repairs and "restorations" the games suffer from.

I was fortunate to find these games in an untouched state (other than the coin door lock that was drilled out). I honestly didn't think there were any warehouse find games like these left in the Republic of Quebecistan. They still have the period correct Dime and Quarter coin mechanisms, the coin boxes with the tops and even the back door keys. The cabinets are solid and have minimal moisture damage.


I have two examples of the same title in similar condition, both operated the same way, stored the same way, even the serial numbers make them less than 10 games apart off the assembly line, so needless to say the repairs were very similar on both games.

The last thing you should do when you first acquire your warehouse find is to plug it in. First: inspect the game. Inspect everything top to bottom, front to back. Start with the plug (stecker), the power cord, the switch, the fuse clips, the fuses, the transformer, all the wiring inside the game. Then everything else: connectors, relays, steppers, motors, coils, etc.

Look for any and all damage, corrosion, missing parts, loose parts. Clean out the cabinet and set aside any parts you may find at the bottom of the cabinet. These parts tell machine's story and can point you towards problems with the game. Then, you have a good overview of the repairs required.


Gearmotors:

Sea Raider uses multiple Multi-Products gearmotors. They have felt pads that should be periodically oiled. An oil hole is provided.


Stepper Units:

Make sure the ratchet gear and shaft spins freely. Free up the drive arm... and the reset arm. Check all the pivot points. Clean the coil stops, coil sleeves and plungers. Burnish the contact pads. Check the wiper assembly. Lube up metal on metal moving parts. There are different schools of thought when it comes to choice of lubricants... pick your libation of choice.


To clean the contact discs. I use a green Scotch-brite pad (the 3M ones, not the knockoffs)  with pure Isopropyl and shop rags. Then I use an electrician's eraser or a fiber pen to clean the conductive pads. Then I use a nylon bristle brush to really clean between the pads. Then I inspect for burnt micarta (phenolic and fiber material) between the pads. Remove the burnt micarta with dentists tools or a hobby knife. To finish it off, I buff the micarta with Novus 2 to take off the swirl marks, making sure to remove all the clay residue from Novus.

Before:


After:


On the printed circuit discs for the torpedo course arm disc and the ship target panel disc I use shop rags, Isopropyl and Novus 2 to avoid damaging the traces and pads. Again I check for burnt material. The ship target panel disc is notorious for burning between the pads at the point where the boat reverses.


Selector unit:


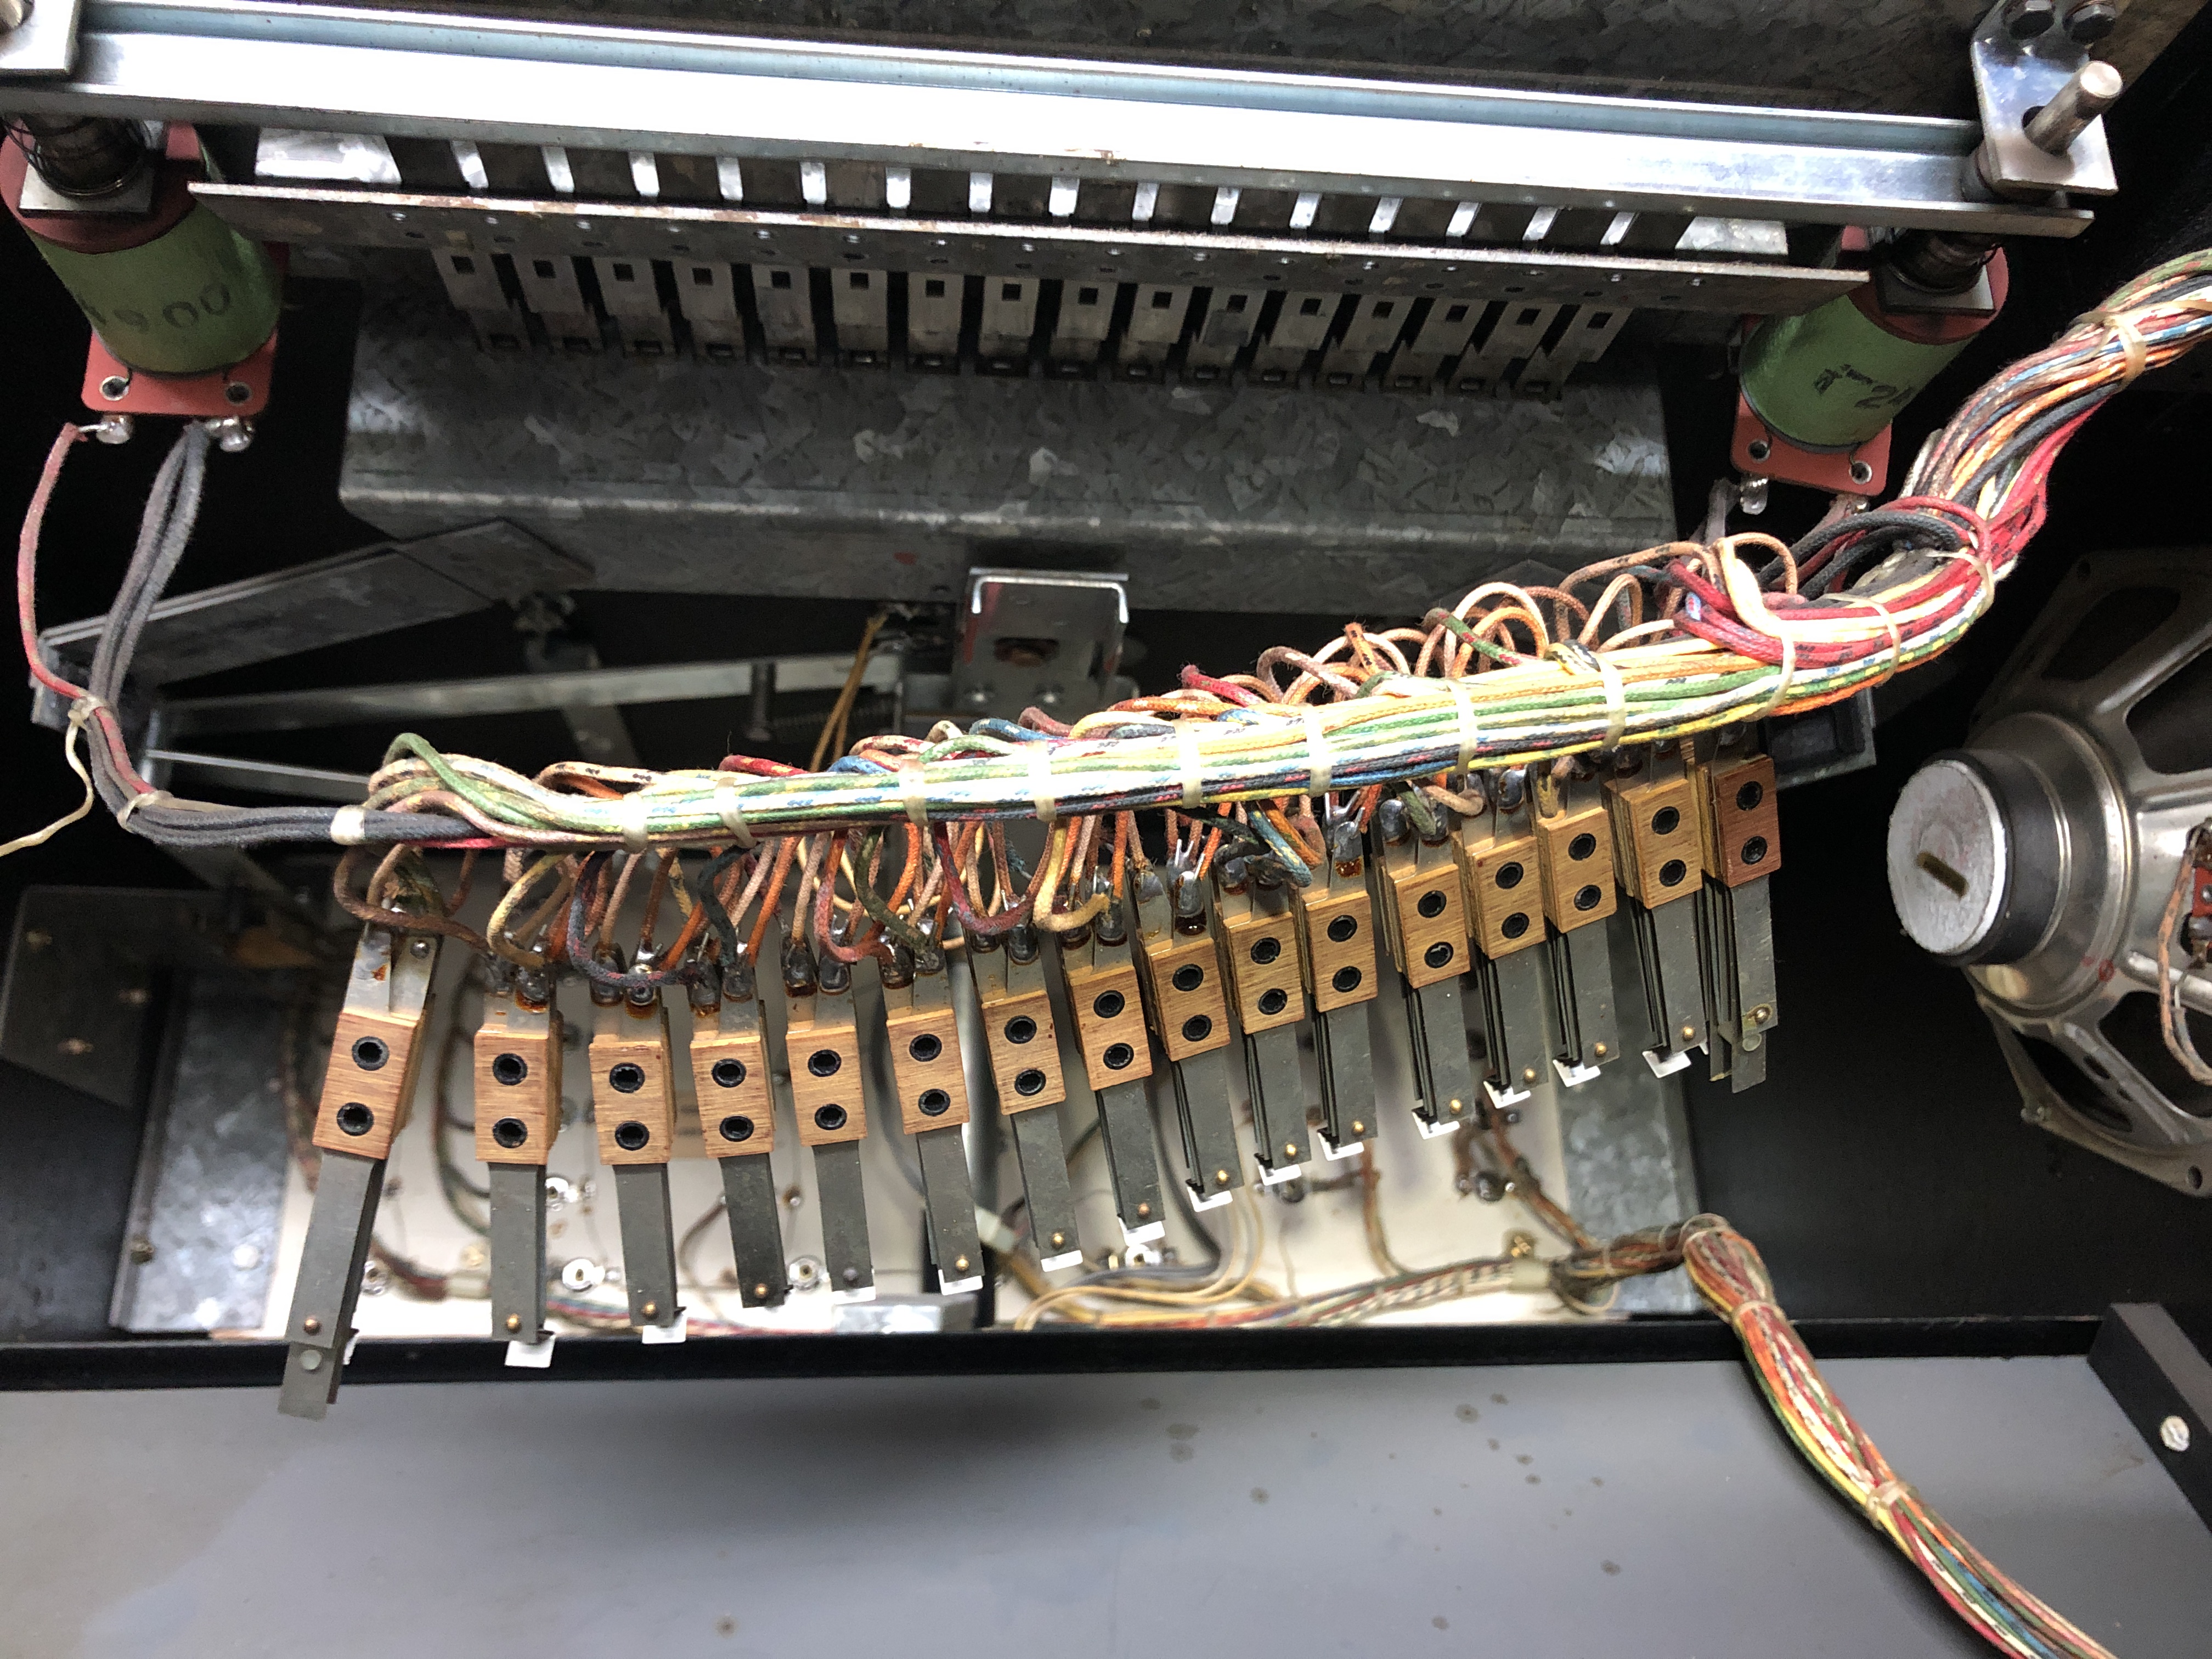
The selector unit switches had to be cleaned. The unit is at the very top of the cabinet. Most of the wires used for this sub assembly are solid wires. I thought it better to unscrew all of the stacks at once instead of one at a time and risk breaking a wire. Top switches are for ship hit detection. Bottom switches are for guiding the torpedo arm left or right. Each switch stack had to be handled gingerly to avoid it falling apart. Cleaned the switch points with a flex stone and a small wire brush. While the unit was apart I found a few wires that were improperly soldered.


Torpedo course arm unit:

One of the machines had some damage to the torpedo course arm unit wiring loom. Part of the torpedo arm rubbed on the wiring that interfered with the arm at end of stroke. That made the whole assembly a shock hazard. Got a good zap off that one. Simple electrical tape fix and I properly tucked away the wiring loom to stop it from rubbing.


New lamps for Sea Raider:

Sea Raider uses #1895 12V bulbs throughout the game. These are getting harder to find now. I bought some N.O.S. bulbs from eBay. 


Jones connector at the bottom of the cabinet (not pictured):

There is a Jones connector at the very bottom of the cabinet. It is used for the coin door and the neon light power. In both games, that connector was problematic and had to be addressed.

Sound Unit:

Sea Raider has a sound unit that produces three distinct sound effects: a radar ping (beep), torpedo white noise once a torpedo is launched and an explosion sound for torpedo/ship hits.

One one of my machine, the sound unit worked perfectly.

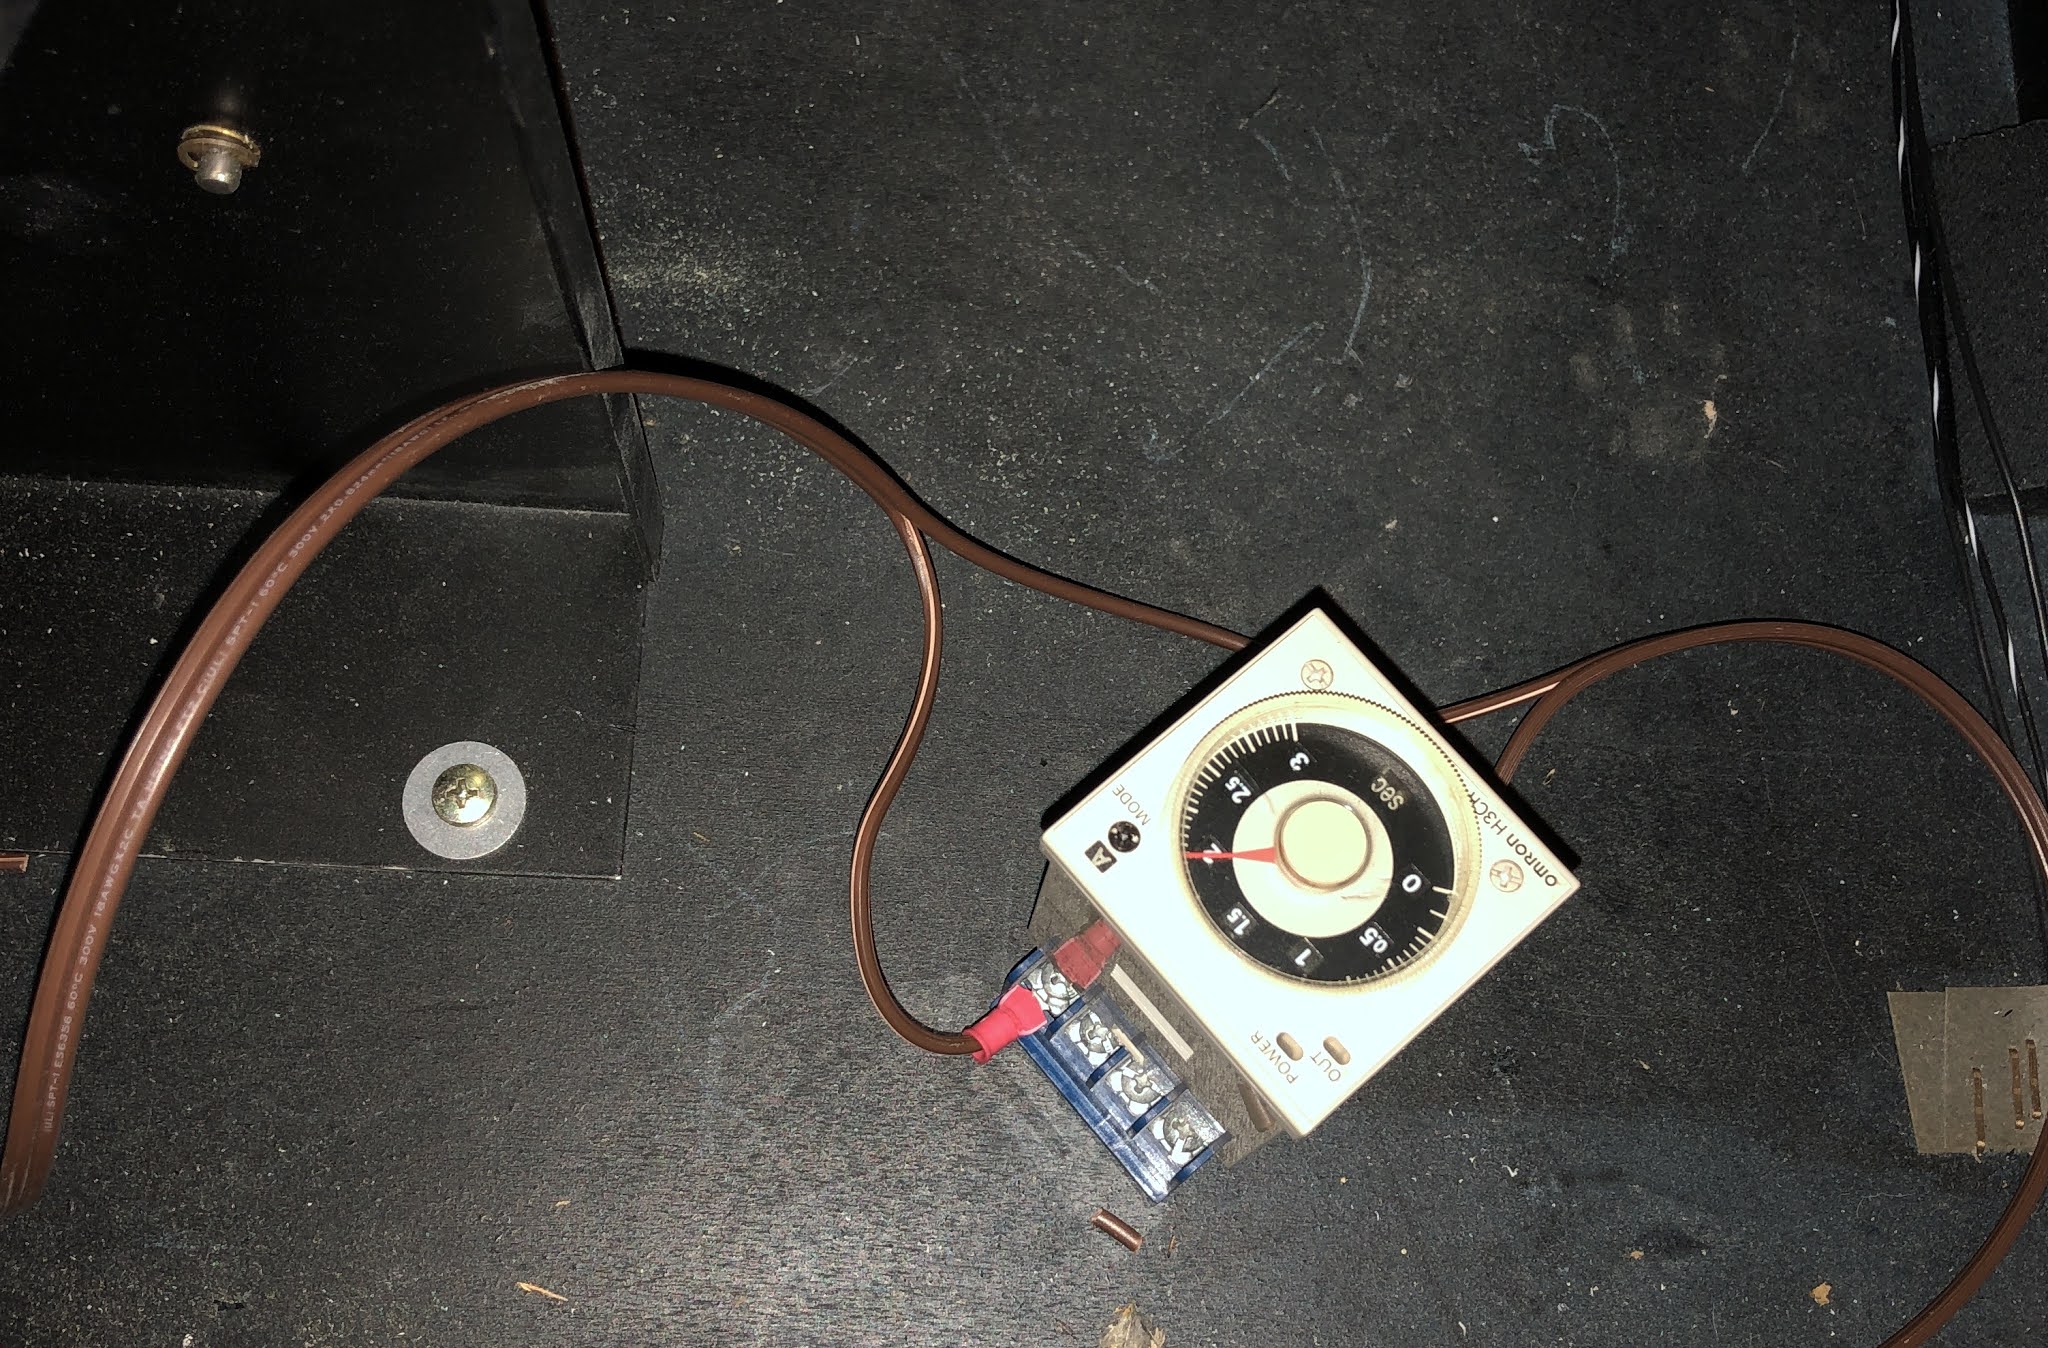
One the other machine, the radar pings didn't work. I had to replace two capacitors. From experience working on a few games from that era, the old silver Sprague capacitors tend to be problematic.


I didn't have any axial capacitors of the right value on hand so I will have to make do with radial caps. They look sorta bodged in, and they are.


Sound board diagram

Sound board diagram for dummies


In conclusion, Sea Raider is an ideal addition to a game room. It has a small footprint, it's simple (to repair and to play) and it's an artifact of the silver age of the coin-operated amusement industry. I recommend it as a novelty in any pinball heavy game room.


Links/ references:

Pete's Game room Sea Raider repair

Some other Sea Raider repair log

Pinrepair.com Sea Raider

Wednesday, February 1, 2023

Two Midway Sea Raiders in 2022

 Midway's 1969 Sea Raider arcade

Midway's Sea Raider


This was my only coin operated amusement road trip of 2022.

I don't go on arcade roadtrips much anymore,

partly because I'm out of space for machines, but that never stopped me before. 

But mostly for misanthropic reasons...

Already in 2019 I was completely fed up with everything and everyone. The last three years have been a complete gong show and my misanthropy has grown by a order of magnitude since.

But a repair dude has got to repair and I got bored.

So I looked at the classifieds... and found a lot of two 1969 Midway Sea Raiders. The games were sold as a pair, non-working untouched warehouse finds at a very reasonable price... 300 kilometers from home.

A quick look at at the cabinet dimensions from the flyer: 23 inches deep meant that I could theoretically fit both game in the back of the minivan. So I took a chance.


The road trip was uneventful except for terrible gas station coffee.

The seller was dubious the games would fit in the back of my van but in the end it worked out. With about 1 inch to spare.

I unloaded the games at my Freundin's place and fixed them up over the holiday season.


Next post the repairs


Sunday, July 3, 2022

Midway S.A.M.I. Arcade intermittent problem repair

I've owned this 1970 Midway S.A.M.I. arcade game for about a year now.


When I first got it I went over the whole game. Cleaned the discs and wipers. Took apart the control unit. Burnished the connectors and perfectly aligned the film with the plane position disc.

Still it had an intermittent problem that would cause the hit relay not to energize.

I would fiddle with the connectors and jiggle the wires, check the continuity between the control unit disc and the plane position disc and the issue would solve itself for a couple months.

I can't say I play this game a lot. It's not a good game to have in a home environment. The plane pattern is too easy to memorize and then there's no challenge to the game. But I like to play it occasionally. Or like when I have some people over.  So when I turn on the game, it's always a gamble whether the game behaves or not.

So when I turned the game ON earlier this week... no dice. Again the multimeter and connector jiggle routine. But this time I finally stumbled upon the problem.

Can you see the problem in the picture below? BTW I slightly enhanced the problem to make it easier to find.


Maybe in this picture?


Turns out the problem the whole time was a broken bare wire jumper for the grey wire between solder lugs on the Hit Relay unit.

The intermittent nature of the problem came from the broken jumper just touching the gob of solder on the lug for the hit relay coil hence why jiggling the wire would "fix it" for awhile.

On the schematic, the problem would be in the red box to put it into perspective.


I completely replaced the bare wire jumper and now it's all good.

This is the kind of stuff you have to look for when working on old arcade games.


Thursday, December 30, 2021

2021 Retrospective... of the games that didn't make it to the blog

Every year I acquire a few amusement devices. However, not all of them make it to my blog.

Either from lack of time or interest. Not every game gets to be written about.

Here are the 2021 games that didn't get a proper convoluted semi-technical write up.

Taiyo Circus:

Purchased off Yahoo Japan Auctions. Released in 1978. This is a great example of a Dagashiya (Japanese traditional Mom & Pop candy store) game. It's a super difficult skill game so it's ideal as a keeper. I highly recommend this game. The aesthetics and gameplay are awesome. A bunch of these popped up on YJA... some lightly used some new (out of the box) and some new in box (NIB). I'd love to know the story of these games. How they appeared in quantity on YJA. Prices are slowly creeping up, so if you are considering one of these better get one sooner than later. Watch out for games with rot or corrosion.


NSM Rider Seven:

Another YJA impulse buy. I've always wanted a NSM Rotamint and I love the esthetics of Dagashiya games. This game combines both. It's a late 60's NSM game that's been converted with a high quality art package, a 10 Yen coin chute and a Nickel sized token chute. The game required a reset coil for the payout unit that had to be sourced from Germany (Thanks Cait). Despite ticking all the boxes I sorta lost interest in this game.


Midway S.A.M.I.:

A legendary offering by Midway in 1970. I think it's one of the best electromechanical arcade games ever produced. Despite not being more complicated than a Sea Raider. The end result is stunning. I've always wanted one of these for my collection. I bought two (one for parts). One day I might take the time to document the production differences between both, one being early production, the other late production. These arcades games, gameplay wise, have a pattern so once you memorize it the game becomes a bit boring. These are super cool nonetheless.


Games Inc. Super Wild Cat:

Another Flasher Console. I don't need another one (I already have a Little Buckaroo and and Mountain Climber project) but this one has a story and some sentimental significance for the seller. These were well built games. One day I'll take the time to write about the innards. In its heyday it was operated in New Brunswick.


Maruto 1961 Single shot pachinko machine:

This game came in very late in the year. I've wanted a single shot pachinko machine for awhile. The opportunity to buy this one came up. It required a bit of soldering work to get it going.


May 2022 be a better one. Cheers!

Sunday, December 20, 2020

Allied Leisure Wild Cycle NIB Repairs

Allied Leisure New In Box Wild Cycle Repairs

In the 4 previous posts I unboxed and documented the state of the insides of a New In Box Allied Leisure Wild Cycle arcade machine.

It was a collector's dream of mine to one day unbox a vintage EM arcade or bingo machine so when I had the opportunity to buy this NIB Wild Cycle I did a two day 1400 km road trip to go get it.


You think that because the machine sat unused in its original box for 50 years, that it would be fully working in perfect condition? You are wrong. Cardboard box or not, time and storage conditions affect the machine.

Parts corrode: switch points, potentiometers, connectors, lamp sockets and zinc plated parts.

Grease dries up or goes hard

Rubber parts degrade, turn to goo, become brittle or deform.

Electronic parts like capacitors and photoresistors go bad.

Gearmotors get stuck in their own grease.

ALSO

There's always the possibility of rodent damage and cosmetically backglass art can degrade.

So If you want to buy a vintage New In Box game: know the risks!

You are rolling the dice on Schrödinger arcade machine. The machine inside the box could be mint or it could be a total POS or something in between. You won't know until you open the box. 

Right out of the box my Wild Cycle partially worked. It turned on and it coined up but road disc did not turn and motorcycle did not steer.

The road disc just needed a bit of hand coaxing to get it started. The gearmotor that drove the disc was jammed in its own grease from lack of use.


For the motorcycle steering I had to change the "O-ring" on the cycle motor pulley and wipe off the old grease on the shaft. Over the years the O-ring got a flat spot that would cause it to jam.
 

When installing a rubber ring on the pulley. I discovered that the pulley was loose on the shaft. The nylon pulley has a set screw to secure it to the motor shaft. The set screw was loose and the motor shaft would spin freely. Again! right out of the box. A manufacturing defect. The words build quality come to mind...Again! First the crash unit then this pulley. This must have been a "Friday afternoon" machine.


The drive belt in the 8-Track tape player turned to goo over the years. The rubber had the consistency of a jujube melting in the sun. I had to scrape off the old belt and clean the residue with pure methanol.


For the time being I replaced the belt with a heavy duty rubber band until I can find a proper belt. It was more to validate that the 8-Track tape player actually worked. The rubber band, being more stretchy than a proper belt does causes a bit of WOW at startup. The important thing is to choose a rubber band that's not too tight as it will strain the motor and the capstan flywheel bearings. The rubber band has to be just tight enough not to slip but has to track properly.
  

Once the disc, motorcycle steering and 8-Track work properly. I could finally play a game on Wild Cycle. The first thing I noticed was the bad road detection. It can be seen in a video of another New in Box Wild Cycle: At 1:29 the motorcycle should not be able to drive over the fork in the road without crashing. The detection should be precise and unforgiving. Stay on the track or crash. On my game, the detection was even worse. It was vague and sometimes delayed. Unplayable!

The poor detection was caused by the old photoresistors. 50 years of total darkness inside the box made the original photoresistors slow to react.


To safely get to the photoresistors I had to take out the whole motorcycle unit and track.

First I had to remove the top shield.


Now we can see the motorcycle manakin better


Then I removed the unit to work on in on the "bench".
Nice side shot of the manakin. The paint job on it is pretty bad.


Back shot of the manakin and we can see the solenoid that tilts the motorcycle.


Old photoresistors.


New photoresistors. I put some protective tubing around the photoresistor legs to avoid the legs shorting out on the bracket.


With the new photoresistors, the crash detection is precise.

Last problem I fixed was more of a design flaw.

When a new game was started, if the previous game ended with a crash, the new game would immediately start with a crash. Sometimes even if the motorcycle was centered on the track the game would still start with a crash. I thought that was unfair to the player. I imagined this caused frustration in the arcades back in the day. "Why did it crash! No fair!"

That's because of a design flaw in the off track detection circuitry. The detection circuitry is powered at the same time as the projector lamp. The crash detection is instantaneous at the start of the game BUT the projector lamp does not start emitting light instantaneously. The filament needs to heat up and get white hot. That delay might be tiny, fractions of a second, but electronics don't lie. The photoresistors detect darkness and trigger the photo relay.

Notice the track is Beige-ish white clear while everything else is dark color. There's a black strip on each side of the track. When a black strip crosses the path of the photoresistors, it triggers a crash. Any darkness will cause a crash. Covering up the photoresistors or turning off the projector lamp causes a crash.

Also When the player got to the Champion track it would always cause a crash at the beginning for no good reason. This can be seen in the New in Box Wild Cycle video at 1:43, motorcycle crashes despite being in the middle of the track. Again because of the delay between detection and the projector lamp turning on. Lamp turns off when the game is switches tracks, Photo relay is triggered by the darkness.


I fixed this design flaw using a Omron industrial delay timer to disable the photo relay at the beginning of a game OR when the player first gets to the Champion track. The delay timer is powered by the 120V of the projector lamp. At power up it will disable the photo relay for 2.5 seconds, giving the player just enough time to center the motorcycle on the track. After that the detection works normally for the rest of the game or until the projector lamp turns off again to switch to the Champion track. Again it gives the player 2.5 seconds to center the bike on the track. The modification only involved desoldering one wire from the original game wiring and is completely reversible if desired. 

I ran some zip cord, held to the wiring loom with zip ties, to the bottom of the cabinet where I put the delay relay and I chose not to screw the relay socket to the bottom of the game to keep the game pristine.


Pin 2 and 7 of the delay timer are parallel to the projector lamp.

Pin 1 and 3 of the delay timer momentraily cut power to the photo relay for 2.5 seconds once the projector bulb is powered. 2 seconds on the dial is more like 2.5 seconds in reality.


With the repairs and the modification done, Wild Cycle is a fun and challenging game. The 8-Track music adds even more enjoyment to the experience.